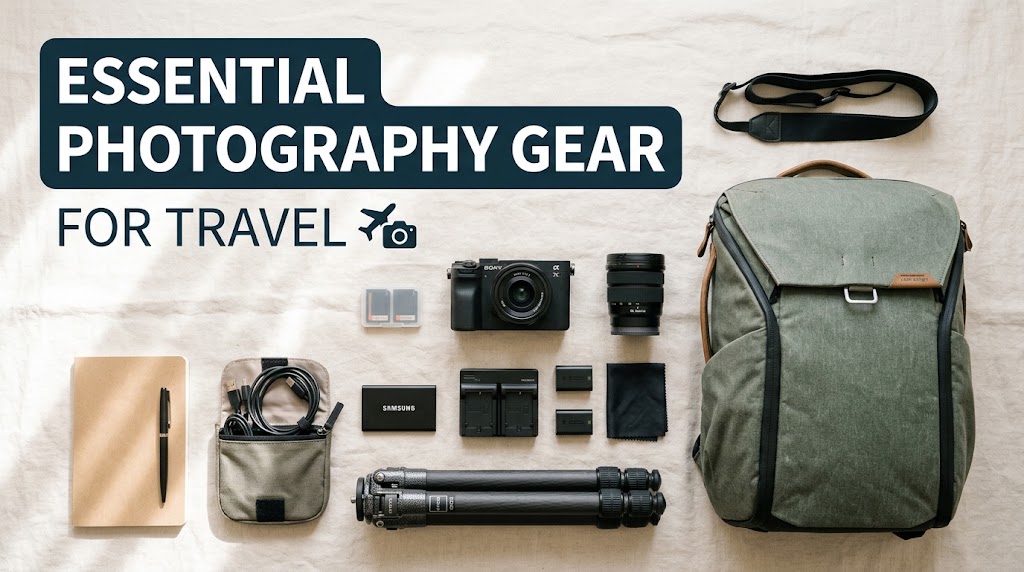
Stepping in front of a camera for the first time can feel intimidating, but the obstacle holding back most aspiring content creators isn’t on-screen charisma—it’s the overwhelming technical barrier to entry. Walk into any audio-visual camera store or scroll through online forums, and you will be hit with an endless stream of technical jargon: bitrates, dynamic range, polar patterns, lux levels, and sensor sizes.
Choosing the wrong gear leads directly to buyer’s remorse, wasted budget, and technical frustration that kills creative momentum before you even post your first video. Conversely, having a streamlined, reliable kit gives you the confidence to focus entirely on telling great stories.
This comprehensive guide breaks down every piece of gear you need to build a professional vlogging setup from scratch. Whether you are filming travel adventures on the run, setting up a sleek desk-bound YouTube studio, or producing daily family vlogs, you will find actionable recommendations, setup frameworks, and budget-friendly strategies tailored to your creative goals.
1. The Core Vlogging Gear Ecosystem: Prioritizing Your Purchases
When starting a vlogging channel, beginners often allocate 90% of their budget toward the camera body. This is the single biggest mistake new creators make. Audiences will tolerate mediocre 1080p video if the story is compelling, but they will swipe away from a 4K video within seconds if the audio is muffled, echoed, or noisy.
To build an efficient gear setup, view your production kit as an interconnected system with a strict priority order.
       ┌─────────────────────────────────────────┐
       │             1. AUDIO SYSTEM             │
       │  (Crisp voice capture, noise isolation)  │
       └────────────────────┬────────────────────┘
                            │
       ┌────────────────────▼────────────────────┐
       │           2. CAMERA & OPTICS            │
       │ (Auto-focus, focal length, screen flip) │
       └────────────────────┬────────────────────┘
                            │
       ┌────────────────────▼────────────────────┐
       │           3. LIGHTING SYSTEM            │
       │ (Subject exposure, color temp balance)  │
       └────────────────────┬────────────────────┘
                            │
       ┌────────────────────▼────────────────────┐
       │        4. STABILIZATION & MOUNT         │
       │   (Tripods, gimbals, desktop arms)      │
       └─────────────────────────────────────────┘
The 50/30/10/10 Budget Framework
If you have a fixed budget (for example, $1,000), distribute your funds according to audience perception principles rather than equipment excitement:
-
50% — Camera Body & Lens: Your core visual engine.
-
30% — Audio Equipment: Microphones, wind protection, and monitoring.
-
10% — Lighting: Soft key lights, fill lights, or portable LEDs.
-
10% — Stabilization & Accessories: Tripods, extra batteries, and fast memory cards.
Key Takeaway: Poor audio ruins good video, but great audio can save average video. Always secure your microphone solution before stretching your budget for a higher-tier camera.
2. Choosing the Right Vlogging Camera
Selecting a camera comes down to your primary shooting environment: Run-and-Gun (Mobility) vs. Studio/Desktop (Controlled).
                                  VLOGGING INTENT
                                         │
                   ┌─────────────────────┴─────────────────────┐
                   │                                           │
         Run-and-Gun Vlogging                         Studio / Talking Head
        (Travel, Daily Life)                           (Tech, Education, Gaming)
                   │                                           │
         ┌─────────┴─────────┐                       ┌─────────┴─────────┐
         │                   │                       │                   │
    Smartphone /        Compact /               APS-C /             Full-Frame
    Action Cam         Micro 4/3             Full-Frame Mirrorless  Mirrorless
Smartphone (The Zero-Barrier Entry)
Modern smartphones feature computational photography engines, multiple lens arrays, and advanced sensor-shift stabilization.
-
Best for: Beginners, daily lifestyle vloggers, and short-form creators (TikTok, Instagram Reels, YouTube Shorts).
-
Pros: Always in your pocket, instant uploads, zero added weight.
-
Cons: Tiny sensors struggle in low light; fixed apertures limit optical background blur (bokeh).
Compact / Fixed-Lens Cameras
Dedicated vlogging compacts combine larger sensors (typically 1-inch) with built-in wide-angle zoom lenses and flip-out screens.
-
Best for: Travel vloggers who need high visual quality without carrying heavy interchangeable lenses.
-
Key Features to Look For: Face/eye-tracking autofocus, built-in ND (neutral density) filters, and top-mounted microphone jacks.
Interchangeable Lens Mirrorless Cameras (APS-C & Full-Frame)
Mirrorless cameras allow you to swap lenses based on the scene. Sensor size dictates low-light performance and shallow depth of field:
-
APS-C (Crop Sensor): Hits the ideal balance of size, cost, and high performance. Excellent for walk-and-talk vlogging.
-
Full-Frame Sensor: Offers maximum low-light performance, cinematic dynamic range, and rich background blur, though at a higher cost and weight.
| Feature / Camera Tier | Smartphones | Compact Vlogging Cams | APS-C Mirrorless | Full-Frame Mirrorless |
| Portability | High | High | Medium | Low |
| Low-Light Quality | Fair | Good | Very Good | Excellent |
| Background Blur (Bokeh) | Digital Simulation | Moderate Optical | Strong Optical | Maximum Optical |
| Setup Complexity | Zero | Low | Medium | High |
| Average Cost Range | $0 (Existing) | $600 – $900 | $800 – $1,500 | $1,800 – $3,500+ |
Vital Camera Features for Vloggers
When evaluating spec sheets, cut through the marketing noise and prioritize these four features:
-
Fully Articulating Screen: A screen that flips to the side allows you to monitor your framing, focus, and audio levels while speaking to the camera.
-
Fast Eye-Tracking Autofocus: You cannot manually pull focus on yourself while vlogging. Look for real-time subject tracking and phase-detection autofocus.
-
In-Body Image Stabilization (IBIS): Electronic or sensor-shift stabilization smoothes out footstep vibrations during walk-and-talk shots.
-
No Record Limits & Heat Management: Ensure the camera can record for extended periods without auto-shutting down due to thermal limits or 29-minute software caps.
Pro Tip: If you vlog handheld at arm’s length, pay close attention to your camera’s crop factor when shooting in 4K or using electronic stabilization. A 16mm lens on an APS-C sensor with a 1.5x crop turns into a 24mm equivalent—which may frame your face too tightly unless held on a long tripod extension.
3. Lenses: Understanding Focal Length & Field of View
Your choice of lens dictates how the viewer experiences your environment. A lens that is too narrow forces your face to fill the entire frame, while a lens that is too wide distorts your facial features.
       10mm - 14mm               16mm - 24mm               35mm - 50mm
┌─────────────────────────┐┌─────────────────────────┐┌─────────────────────────┐
│ Ultra-Wide Angle        ││ Ideal Vlogging Range    ││ Cinematic / Portrait    │
│ Shows face + broad      ││ Perfect balance of face ││ Tight framing, heavy    │
│ background context.     ││ and room context.       ││ background blur.        │
└─────────────────────────┘└─────────────────────────┘└─────────────────────────┘
The Best Focal Lengths for Vlogging (35mm Equivalent)
-
16mm to 20mm (Ultra-Wide): The sweet spot for handheld walk-and-talk vlogging. It holds your head and shoulders in frame comfortably while showing plenty of background context without stretching your arm.
-
24mm to 35mm (Standard Wide): Excellent for desk setups, seated interviews, or vlogging with a tripod placed 3 to 5 feet away.
-
50mm+ (Telephoto/Portrait): Reserved for B-roll details, cinematic product close-ups, and dramatic background separation. Unusable at arm’s length.
Prime Lenses vs. Zoom Lenses
-
Prime Lenses (Fixed Focal Length): Offer wider apertures (e.g., f/1.4 or f/1.8), letting in significantly more light and creating buttery background blur. However, you cannot zoom in or out without physically moving.
-
Zoom Lenses (Variable Focal Length): Offer maximum versatility (e.g., 10-18mm or 16-55mm). You can adjust framing quickly, but they usually feature smaller maximum apertures (e.g., f/2.8 or f/4).
Example Scenario: If you vlog while hiking or exploring cities, choose a wide-angle zoom lens (e.g., 10-18mm f/4) for lightweight versatility. If you vlog in a low-lit home office, choose a wide prime lens (e.g., 16mm f/1.4) to maximize incoming light and create clean separation from your background.
4. Audio Gear: The Secret to High Viewer Retention
Subpar audio breaks the viewer’s immersion faster than poor video. If your audience has to strain to hear your voice over wind noise, room echo, or traffic, they will close the video.
The Three Main Microphone Types for Vlogging
                        SELECTING A MICROPHONE
                                  │
          ┌───────────────────────┼───────────────────────┐
          │                       │                       │
     Shotgun Mics           Lavalier Mics           USB / XLR Mics
 (On-Camera Directional)   (Body-Worn Wireless)    (Desktop / Studio)
          │                       │                       │
  Best for quick outdoor   Best for wide shots &   Best for seated indoor
    walk-and-talks          mobile movement         studio setups
1. On-Camera Shotgun Microphones
Mounting directly into your camera’s hot shoe, shotgun mics use a supercardioid pickup pattern to capture sound directly in front of the lens while rejecting noise from the sides and rear.
-
Best for: Quick run-and-gun setups where you don’t want to clip wires onto your clothing.
-
Must-Have Accessory: A high-density foam windscreen or a synthetic fur “deadcat” windshield to eliminate atmospheric wind noise outdoors.
2. Wireless Lavalier (Lapel) Systems
Wireless lavaliers clip directly to your shirt collar, keeping the microphone element a constant 6 to 8 inches from your mouth regardless of camera distance or movement.
-
Best for: High-movement vlogging, outdoor environments, or scenes where you walk far away from the camera.
-
Pro Tip: Position the microphone capsule pointing down toward your chest, not straight up at your mouth. This reduces harsh plosive sounds (“P” and “B” pops) and prevents wind gusts from hitting the capsule head-on.
3. Desktop USB / XLR Condenser Mics
Larger-diaphragm microphones mount on boom arms or desktop stands.
-
Best for: Stationary indoor channels, talking-head education, voiceovers, and podcast-style vlogs.
5. Lighting: Crafting a Clean, Professional Look
Lighting is not just about making your video brighter; it is about creating dimensional contrast and guiding the viewer’s eye to your face.
The Standard 3-Point Studio Lighting Setup
When filming indoors or at a desk, rely on classic 3-point lighting principles to transform flat video into professional imagery.
                  [ Background / Wall ]

                      [ Subject ]
                           ▲
             ┌─────────────┴─────────────┐
             │                           │
      (45° Angle)                 (45° Angle)
    [ KEY LIGHT ]               [ FILL LIGHT ]
   (Bright / Soft)            (Dim / Diffused)
             │                           │
             └─────────────┬─────────────┘
                           │
                      [ CAMERA ]
-
Key Light: Your primary light source. Place it 45 degrees to the side of your face and slightly above eye level. Use a softbox or diffuser so shadows wrap gently around your features.
-
Fill Light: Placed opposite the key light at a lower intensity (or using a reflector card) to soften deep shadows under your eyes and nose.
-
Hair / Backlight (Rim Light): Placed behind you, pointing at your shoulders and neck. It creates a subtle highlight rim around your silhouette, physically separating you from the room’s background wall.
Mobile & Outdoor Lighting Strategies
-
On-Camera LED Panels: Compact bi-color or RGB LED panels fit onto your camera top or phone rig. Use them to fill in harsh eye shadows when shooting under direct midday sun.
-
Golden Hour: Schedule outdoor walk-and-talk vlogs during the hour after sunrise or the hour before sunset. The low sun angle acts as a massive natural softbox, giving skin tones a warm, flattering glow.
-
Positioning Relative to Windows: When vlogging indoors without professional lights, face a large window directly. Never place the window directly behind you, or your camera will blow out the background into bright white and leave your face dark.
6. Stabilization, Support & Crucial Accessories
Shaky, handheld video causes visual fatigue. Proper stabilization transforms frantic footage into smooth visual stories.
Tripods, Handles, and Gimbals
-
Flexible Handheld Tripods: Articulating leg tripods double as tabletop mounts and handheld extension grips, making them essential for walk-and-talk vlogging.
-
Motorized 3-Axis Gimbals: Gimbals use brushless motors to actively counteract pan, tilt, and roll movements. Use them for buttery smooth walking shots, running follow-shots, or cinematic ambient B-roll.
-
Desktop Boom Arms: Keep your workspace clear and eliminate mechanical desk vibrations by mounting desktop microphones on articulated spring arms.
Essential Vlogging Accessories Checklist
  ┌──────────────────────────────────────────────────────────┐
  │         ESSENTIAL VLOGGING ACCESSORIES CHECKLIST         │
  ├──────────────────────────────────────────────────────────┤
  │ [ ] Fast SD Cards (UHS-II, V30/V60 Speed Ratings)        │
  │ [ ] Minimum 3x Spare Batteries or USB-C Power Bank Pass  │
  │ [ ] Variable Neutral Density (VND) Lens Filters          │
  │ [ ] Microfiber Cloths & Air Blower Cleaning Kit          │
  │ [ ] Protective Padded Camera Wrap / Gear Organizer Case │
  └──────────────────────────────────────────────────────────┘
Pro Tip: When shooting video outdoors, keeping your shutter speed locked at double your framerate (the 180-Degree Shutter Rule, e.g., 1/50s for 24fps) is essential for natural motion blur. On bright sunny days, your image will overexpose at 1/50s. Screw a Variable ND Filter ( sunglasses for your lens) onto your optics to cut light without changing your shutter speed or aperture settings.
7. Common Vlogging Gear Pitfalls (And How to Avoid Them)
Pitfall 1: Buying High-End Gear Before Establishing a Workflow
-
The Mistake: Investing thousands of dollars in cine-line cameras and heavy cinema lenses on day one, only to realize the setup is too heavy and complex to take on trips.
-
The Fix: Start minimal. Upgrade gear only when you reach clear technical limits with your existing setup.
Pitfall 2: Ignoring Audio Gain Staging
-
The Mistake: Plugging an external microphone into your camera, turning up the camera’s low-quality internal preamp, and introducing static hiss to the audio track.
-
The Fix: Lower your camera’s internal mic volume down to minimum level (e.g., level 1 or 2). Increase the signal on your external microphone system instead. This uses the cleaner preamp in your microphone, giving you crisp sound without background static.
Pitfall 3: Over-Relying on Auto-White Balance (AWB) indoors
-
The Mistake: Filming in rooms with mixed lighting (warm lamps combined with cool window daylight). The camera’s auto white balance continuously shifts color tints midway through a sentence.
-
The Fix: Lock your camera’s White Balance manually (e.g., 5600K for daylight or 3200K for warm indoor lights) so your skin tones remain consistent across cuts.
8. Frequently Asked Questions (FAQ)
What is the absolute minimum gear needed to start vlogging?
The absolute minimum gear needed to start vlogging is a modern smartphone, a basic smartphone tripod mount with an extension grip, and a budget-friendly wired or wireless lapel microphone. This minimal setup costs under $50 if you already own a smartphone and provides professional sound and steady framing.
Is 4K video resolution necessary for vlogging, or is 1080p enough?
While 1080p (Full HD) remains completely acceptable for viewer consumption on mobile devices, shooting in 4K gives you significant editing flexibility. 4K footage allows you to crop, re-frame, or punch in for close-up cuts during post-production without losing detail when delivering your final project in 1080p.
How do I choose between a mirrorless camera and an action camera for vlogging?
Choose a mirrorless camera if your vlogs focus on talking-head education, lifestyle, beauty, or travel where high image quality, shallow background blur, and interchangeable lenses matter. Choose an action camera if your content involves high-speed movement, extreme sports, water exposure, or unpredictable environments where durability and compact mounting are critical.
How can I record clean audio outdoors on windy days?
To record clean audio on windy days, use a directional mic or a wireless lapel fitted with a high-density synthetic fur wind muff (often called a “deadcat”). The fur strands disrupt incoming gusts of wind before they strike the mic diaphragm, suppressing turbulence rumble while keeping your voice clear.
Conclusion: Start Small, Iterate Fast
Gear is an amplifier of storytelling, not a replacement for it. The best vlogging kit is ultimately the one you have with you, understand thoroughly, and can operate without frustration.
Rather than waiting until you can afford a top-tier setup, build your production pipeline incrementally:
-
Stage 1: Master your smartphone camera paired with an inexpensive lavalier mic. Focus entirely on framing, lighting placement, and on-camera speech cadence.
-
Stage 2: Upgrade to a dedicated compact or APS-C mirrorless camera when your channel demonstrates consistent output and audience growth.
-
Stage 3: Invest in specialized prime lenses, wireless audio receivers, and permanent 3-point studio softboxes as your visual style matures.
Pick up the equipment you currently own, set up your audio, frame your shot, and press record today.

Alex Turner is a dedicated product researcher and reviewer at TopBuyGuide.com, known for his clear, honest, and data-driven insights. He spends countless hours testing, comparing, and analyzing products to help readers make confident and informed buying decisions.