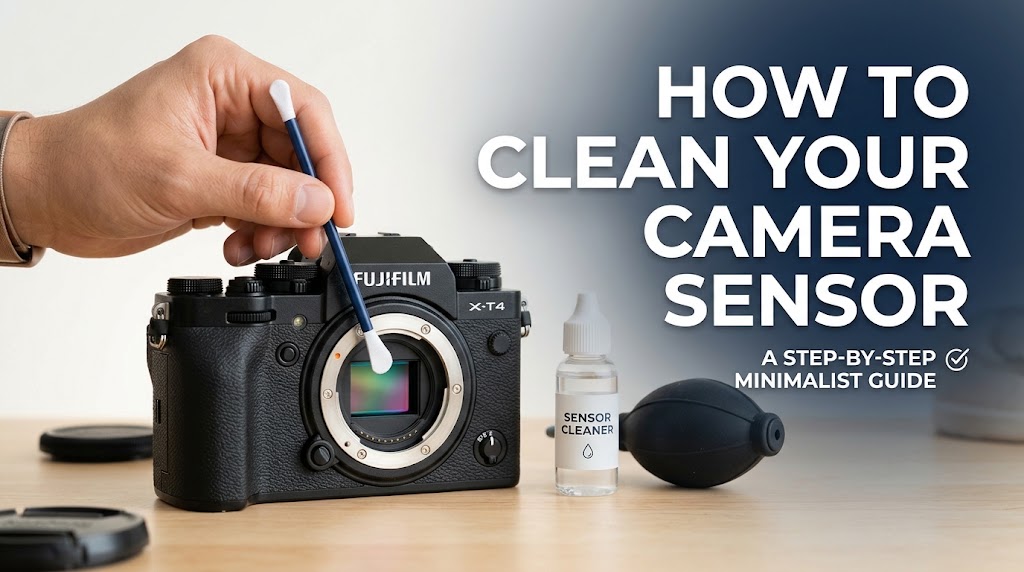
Have you ever spent hours capturing stunning landscapes or portrait shots, only to open your photos on a monitor and spot persistent, hazy dark dots scattering across every frame? That isn’t lens dust, and it isn’t a glitch on your screen. It is dust sitting directly on your camera’s digital sensor.
Camera sensors are electrostatically charged magnets for atmospheric dust, pollen, fabric fiber, and microscopic moisture droplets. Whenever you swap lenses in the field, you open the heart of your camera to the environment. Left unchecked, sensor contamination degrades picture sharpness, ruins batch photo edits, and forces you into tedious clone-stamping sessions during post-production.
Cleaning a camera sensor strikes terror into the heart of many photographers. The sensor is the single most expensive component inside your mirrorless or DSLR camera body. However, sending your equipment to a service center every time a speck of dirt lands on the glass cover is costly and impractical.
In this complete master guide, you will learn how to identify sensor dust, assemble the right professional toolkits, master both dry and wet cleaning procedures safely, and implement a preventative maintenance workflow to keep your sensor pristine for years to come.
Understanding the Enemy: What Is Sensor Dust and How Does It Get There?
Before touching your camera’s internals, it is crucial to understand what you are actually cleaning. When photographers talk about “cleaning the sensor,” they are not touching the delicate silicon wafer itself. Modern digital cameras feature a specialized glass filtration stack sitting directly above the image sensor. This stack includes IR/UV cut filters, anti-aliasing filters, and protective cover glass.
While this glass shield is durable, it is optically sensitive. A microscopic scratch or chemical residue on this glass will permanently mar your images.
+--------------------------------------------------------+
|                   LENS MOUNT OPENING                   |
+--------------------------------------------------------+
                           |
                           v
+--------------------------------------------------------+
|                  SHUTTER / MIRROR MECHANISM            |
+--------------------------------------------------------+
                           |
                           v
+--------------------------------------------------------+
|            PROTECTIVE GLASS / FILTER STACK             | <-- What you clean
+--------------------------------------------------------+
                           |
                           v
+--------------------------------------------------------+
|               SILICON IMAGE SENSOR (CMOS)              | <-- Protected
+--------------------------------------------------------+
How Contamination Enters Your Camera
-
Lens Swapping: Changing lenses outdoors, especially in windy, humid, or dusty environments, introduces airborne debris directly into the mirror box or mirrorless chamber.
-
Internal Zoom Mechanisms: Non-weather-sealed zoom lenses act like air pumps. Expanding and retracting the barrel draws ambient air and dust particles into the camera housing.
-
Mechanical Wear: Internal mechanical components (such as shutters and mirror boxes) drop tiny specs of manufacturing lubricant or microscopic metallic debris onto the filter stack over time.
-
Humidity and Condensation: Moving your camera between drastic temperature shifts (e.g., from an air-conditioned car to hot, humid air) creates condensation spots that trap airborne salts and minerals on the glass.
💡 Pro Tip: Mirrorless vs. DSLR Exposure
Mirrorless cameras are significantly more susceptible to sensor dust than traditional DSLRs. In DSLRs, a physical mirror sits in front of the shutter and sensor, offering a physical barrier. In most mirrorless cameras, removing the lens exposes the sensor assembly directly to the open air just inches behind the lens mount.
How to Test for Sensor Dust (The Aperture Test)
Dust on your lens front element is often invisible in final photos because it sits outside the lens’s focal plane. Dust on your sensor, however, sits directly in front of the light collectors. To reliably detect sensor spots before cleaning, follow this standard optical test.
Step-by-Step Sensor Dust Diagnostic
-
Mount a Clean Lens: Attach a prime or standard zoom lens to your camera. Ensure the front and rear elements of the lens are completely clean.
-
Set Minimum ISO: Dial your camera to its lowest native base ISO (typically ISO 100 or 200) to eliminate digital grain noise.
-
Stop Down the Aperture: Switch to Aperture Priority Mode (A/Av) and set your aperture to f/16 or f/22. Narrowing the light path increases the depth of field right at the sensor surface, causing shadow cast from dust specks to appear sharp and defined.
-
Target a Uniform Light Surface: Point your camera at a evenly illuminated, clear subject—a clean white wall, a bright white computer screen, or a cloudless blue sky.
-
Defocus the Lens: Switch your lens to Manual Focus (MF) and completely defocus the lens so the target surface is blurred.
-
Take the Shot: Take a picture while slightly panning the camera during exposure. Any true detail on the wall will blur out, while dust specks on the sensor will remain pin-sharp dark spots.
+---------------------------------------------------------------+
|                       SENSOR DIAGNOSTIC LOG                   |
+---------------------------------------------------------------+
| Aperture Setting  | Spot Appearance    | Action Required      |
+-------------------+--------------------+----------------------+
| f/2.8 to f/5.6    | Invisible / Soft   | None (Minor dust)    |
| f/8 to f/11       | Mild, soft halos   | Air Blower / Dry     |
| f/16 to f/22      | Sharp, dark spots  | Full Wet Clean       |
+---------------------------------------------------------------+
📓 Real-World Scenario
You take a photo at f/2.8 and the sky looks perfect. You stop down to f/16 for a landscape photograph, and suddenly ten small black circles appear across the mountain skyline. Those spots were always there, but wide apertures allow light to bend around small particles, hiding them from the image sensor.
Essential Gear: Building Your Sensor Cleaning Kit
Never use general household supplies to clean your camera sensor. Canned compressed air can spray chemical propellants that ruin filter coatings, paper towels leave abrasions, and isopropyl alcohol from pharmacy shelves leaves greasy streaking residue.
1. The Basic Gear Checklist
-
Manual Air Blower: Use a dedicated silicone bulb blower (such as the Giottos Rocket Blower). Never use compressed air cans.
-
Sensor Cleaning Swabs: Correctly sized swabs manufactured in cleanroom environments. Sizes must match your camera format:
-
Full Frame: 24mm swab width
-
APS-C: 16mm swab width
-
Micro Four Thirds (MFT): 12mm swab width
-
-
Sensor Cleaning Solution: Pure, fast-evaporating solvent formulas designed specifically for optical filters (e.g., Eclipse solution or alcohol-free specialized fluids).
-
Sensor Scope (Optional but Recommended): A 5x–10x illuminated magnifying loupe that rests over your lens mount, allowing you to see microscopic specs on the glass before and after cleaning.
-
Static Blower / Sensor Brush: An electrostatically charged specialized brush designed to lift loose debris without contacting the glass with high friction.
+-----------------------------------------------------------------------+
|                       SENSOR SWAB SIZING GUIDE                        |
+-----------------------------------------------------------------------+
| Sensor Format      | Dimensions        | Correct Swab Size           |
+--------------------+-------------------+-----------------------------+
| Full-Frame (35mm)  | 36mm x 24mm       | 24mm Swab                   |
| APS-C (Crop)       | 23.6mm x 15.6mm   | 16mm Swab                   |
| Micro Four Thirds  | 17.3mm x 13.0mm   | 12mm Swab                   |
+-----------------------------------------------------------------------+
Step-by-Step Guide: Cleaning Your Sensor Safely
Sensor cleaning should follow a strict, progressive workflow. Always start with the least invasive method (Dry/Air Cleaning) before moving to advanced methods (Wet Cleaning).
   [ DIAGNOSTIC TEST (f/16) ]
               |
               v
  [ LEVEL 1: Automatic Sensor Clean ]
               | (If spots persist)
               v
  [ LEVEL 2: Manual Air Blower ]
               | (If spots persist)
               v
  [ LEVEL 3: Dry Brush / Sensor Gel Pad ]
               | (If spots persist)
               v
  [ LEVEL 4: Wet Swab Cleaning ]
Level 1: Automatic In-Camera Cleaning
Modern digital cameras feature piezoelectric cleaning systems that vibrate the sensor glass at ultrasonic frequencies to shake loose dry debris.
-
Turn off your camera and turn it back on to trigger auto-cleaning (if configured in settings).
-
Manually enter your camera menu, locate Sensor Cleaning, and select Clean Now.
-
Repeat the cycle 2–3 times.
-
Take a test shot at f/22 to check if the spots disappeared.
Level 2: Dry Air Blower Cleaning
If automatic cleaning fails to dislodge the particles, use physical air pressure.
Preparation
-
Find a clean, draft-free room with minimal dust (bathrooms after a warm shower run are naturally low-dust environments due to ambient steam settling airborne particles).
-
Fully charge your camera battery. Critical: If your camera battery dies during manual cleaning, the physical mechanical shutter or mirror assembly will snap shut onto your hands or tools, causing catastrophic mechanical damage.
DSLR Execution: Locking Up the Mirror
-
Remove the lens and turn on the camera.
-
Navigate to Menu -> Setup Menu -> Lock Mirror up for Cleaning (or Sensor Cleaning -> Manual).
-
Press the shutter button to lock the mirror up and expose the sensor.
Mirrorless Execution
-
Turn off the camera (or select manual sensor cleaning in settings).
-
Remove the lens to expose the open sensor chamber.
The Air Cleaning Steps
-
Hold the camera body facing downwards toward the floor. Gravity helps dislodged dust fall out of the chamber rather than settling back inside.
-
Hold the nozzle of your hand blower near the lens mount. Do not insert the tip of the blower inside the camera mount plane to prevent accidental contact with the glass.
-
Give 5 to 10 firm, rapid squeezes of air into the chamber.
-
Turn off the camera to reset the shutter/mirror, attach your lens, and shoot another diagnostic test frame.
                   [ CAMERA BODY (FACING DOWN) ]
                           \         /
                            \       /
                             |     |
                             |_____|
                                ^
                                |  (Air flow upwards / Dust drops down)
                             [ ===== ]
                             [ BLOWER]
                             [ BULB  ]
🛑 Warning
Never blow air onto the sensor with your mouth. Microscopic droplets of saliva will deposit enzymes and moisture onto the glass, forcing you to perform an immediate wet clean.
Level 3: Wet Cleaning (The Gold Standard for Persistent Spots)
When sticky oils, pollen, or humidity droplets weld dust particles to your sensor filter, dry air will not dislodge them. Wet swab cleaning is the definitive method to restore a sensor to factory-clean status.
+-----------------------------------------------------------------+
|                       WET CLEANING WORKFLOW                     |
+-----------------------------------------------------------------+
| STEP 1: Fully charge battery & select Manual Sensor Clean mode. |
| STEP 2: Apply EXACTLY 1-2 drops of liquid solvent to swab.      |
| STEP 3: Wait 10 seconds for solvent to absorb evenly across edge.|
| STEP 4: Sweep left-to-right at a single 45-degree angle.        |
| STEP 5: Flip swab to clean side, sweep right-to-left.           |
| STEP 6: Inspect under light and take a diagnostic test photo.   |
+-----------------------------------------------------------------+
Step 1: Prepare the Swab
-
Take a fresh, individually wrapped sensor swab out of its protective packaging. Do not touch the cloth head with your fingers.
-
Dispense 1 to 2 drops max of optical cleaning solvent onto the top edge of the swab fabric.
⚠️ Crucial Fluid Warning
Over-saturating the swab is the #1 mistake photographers make. Liquid should not pool or drip off the swab. Excess fluid leaks past the edge of the sensor glass ring, dissolving internal mounting adhesives or seeping into lower filter layers, causing permanent water-mark damage.
Step 2: The Precise Swab Stroke
-
Align the edge of the swab with the far left side of the sensor filter.
-
Tilt the swab handle at a 45-degree angle relative to the sensor plane.
-
Apply firm, gentle, and constant pressure (similar to writing on paper with a fine fountain pen).
-
Drag the swab smoothly across the entire width of the sensor in one continuous movement from left to right.
-
Once you reach the right side, do not lift or reverse the same side of the swab.
-
Flip the swab over to use the clean, unused reverse edge.
-
Tilt to a 45-degree angle in the opposite direction and drag the swab back from right to left in a single continuous motion.
       SWIPE 1 (Left to Right)             SWIPE 2 (Right to Left - Clean Side)

          /  (45° Angle)                              \  (45° Angle)
         /                                             \
        v                                               v
   [====================]                         [====================]
   | Sensor Glass Face  |                         | Sensor Glass Face  |
   +--------------------+                         +--------------------+
Step 3: Immediate Inspection and Disposal
-
Lift the swab directly out of the chamber and throw it away immediately. Never re-use a sensor swab. Re-using a swab drags grit across the glass, causing scratches.
-
Inspect the surface using a illuminated sensor scope or magnifying glass.
-
If liquid streaks appear, you used too much fluid. Wait 60 seconds for the fluid to evaporate, or use a completely dry swab to lift remaining residue.
-
Mount your lens, exit manual cleaning mode, and shoot a test image at f/22.
5 Common Sensor Cleaning Mistakes to Avoid
Even seasoned professionals ruin camera gear by taking shortcuts. Memorize these key errors to keep your equipment safe:
1. Using Canned Air (Dust-Off Cans)
Canned air relies on compressed chemical propellants like fluorocarbons. Squeezing the trigger can spray freezing chemical liquid directly onto your warm sensor, creating severe cold thermal shock that can shatter optical filter glass or leave insoluble chemical films.
2. Reusing Sensor Swabs
Sensor swabs act like micro-sponges that trap fine particulate matter inside micro-fibers. Re-using a dirty swab—even once—turns those dislodged microscopic quartz and mineral grains into sandpaper that will permanently scratch your glass filter stack.
3. Cleaning on Low Battery
If your camera shuts down mid-clean, the mechanical shutter curtain snaps closed instantly. If a swab or brush is in the chamber when the shutter drops, the shutter blades will bend and fail, resulting in a multi-hundred-dollar repair bill.
4. Excessive Liquid Application
Flooding the swab creates liquid capillary creep. The excess solvent moves around the glass border, dissolving internal dampening grease and carrying suspended dirt behind the glass stack where no swab can ever reach it.
5. Cleaning in Drafty Environments
Cleaning near open windows, active ceiling fans, or dusty workspaces pulls fresh airborne particles straight onto the exposed glass during the cleaning process.
Preventative Maintenance: Keeping Your Sensor Clean Long-Term
While knowing how to clean your sensor is an essential photography skill, avoiding contamination in the field keeps you shooting longer and minimizes maintenance risks.
+-------------------------------------------------------------------------+
|                  PREVENTATIVE SENSOR CARE CHECKLIST                      |
+-------------------------------------------------------------------------+
| [ ] Turn off camera power BEFORE changing lenses.                       |
| [ ] Point camera body downward toward the ground during lens swaps.    |
| [ ] Pre-clean lens rear caps and rear lens glass elements regularly.    |
| [ ] Avoid lens changes in high-wind, sandy, or humid environments.       |
| [ ] Keep your primary camera bag vacuumed and free of internal dust.    |
+-------------------------------------------------------------------------+
1. Master the Rapid Lens Change Technique
-
Always turn off camera power before unmounting a lens. When powered on, the sensor maintains a static electrical charge that actively attracts airborne dust particles.
-
Prepare your new lens before removing the old one. Uncap the rear cover of the replacement lens so it sits ready to mount immediately.
-
Hold the camera mount facing downward toward the dirt/ground during the swap so gravity works for you rather than against you.
2. Keep Your Camera Bag Clean
Dust often gathers inside camera bags. Lint, sand, and crumb debris build up at the bottom of compartments and transfer onto rear lens caps, entering your camera chamber during swaps. Vacuum the inside dividers of your gear bag every few months.
3. Enable Sensor Shielding Features
If you shoot with modern mirrorless cameras (such as recent Canon EOS R or Sony Alpha models), check your menu settings for features like Shutter Closed on Power Down. Closing the mechanical shutter curtain when the camera powers down provides a physical barrier while changing lenses outdoors.
Frequently Asked Questions (FAQ)
How often should I clean my camera sensor?
You should only clean your camera sensor when visible dust spots appear in your actual photographs during regular shooting conditions. Avoid cleaning on a fixed calendar schedule. Unnecessary physical contact with the optical glass filter increases risk without added benefit.
Will a dirty sensor damage my camera permanently?
No, organic dust and soft fibers sitting on the protective glass filter stack will not cause permanent damage. However, allowing dirt mixed with environmental moisture, salt water spray, or fungal spores to linger for years can erode chemical coatings on the glass surface over time.
Can I use rubbing alcohol (Isopropyl Alcohol) on my sensor?
No. Standard store-bought isopropyl alcohol contains up to 30% water, oils, and chemical impurities that leave heavy streaks on high-grade glass. Always use pure optical-grade solvents designed specifically for digital camera sensors, such as methanol-based or specialized non-flammable photographic fluids.
What should I do if a dust spot will not come off after wet cleaning?
If persistent spots remain after two wet cleaning passes, do not scrub harder. Pressure can damage the sensor stabilization system (IBIS) or scratch the glass coating. The spot may be a smudge of stubborn grease, grease under the filter glass, or internal lens element contamination. Have your equipment evaluated by an authorized manufacturer repair technician.
Does In-Body Image Stabilization (IBIS) affect how I clean my sensor?
Yes. Cameras equipped with IBIS feature floating sensor assemblies suspended by delicate magnetic actuators. When wet cleaning an IBIS-equipped camera, use gentle, measured strokes. Excessive downward pressure pushes the floating assembly against its travel limits, potentially damaging the alignment motor tracks.
Master Your Maintenance Workflow
Cleaning your camera sensor doesn’t have to be nerve-wracking. By taking a methodical approach—moving progressively from automated air cleaning to careful wet swabbing—you can maintain pristine image quality without paying expensive service center fees.

Alex Turner is a dedicated product researcher and reviewer at TopBuyGuide.com, known for his clear, honest, and data-driven insights. He spends countless hours testing, comparing, and analyzing products to help readers make confident and informed buying decisions.